Kombucha has become part of my daily routine. I typically have a small glass of this fermented tea when I get home from school. Kombucha is touted as a drink which aids digestion and stimulates gut bacteria with its probiotic properties. It’s a very simple recipe; the wee glitch is that you need to find a SCOBY, which Wikipedia tells me is a “symbiotic ‘colony’ of bacteria and yeast.” The scoby is a thickly gelatinous and goopy feeling disk that you need to help the fermentation process. I’ve been fortunate to have one from a workshop I attended, as well, I’ve got a friend who makes kombucha and I’ve scored a scoby from her. The ingredients for making kombucha are water, black or green tea, sugar, and a scoby. If you are not into eating sugar, don’t fret, the job of the scoby is to absorb and ‘eat’ the sugar during the fermentation process. My kombucha does not taste sweet; if anything it’s a little sour in its light effervescence.
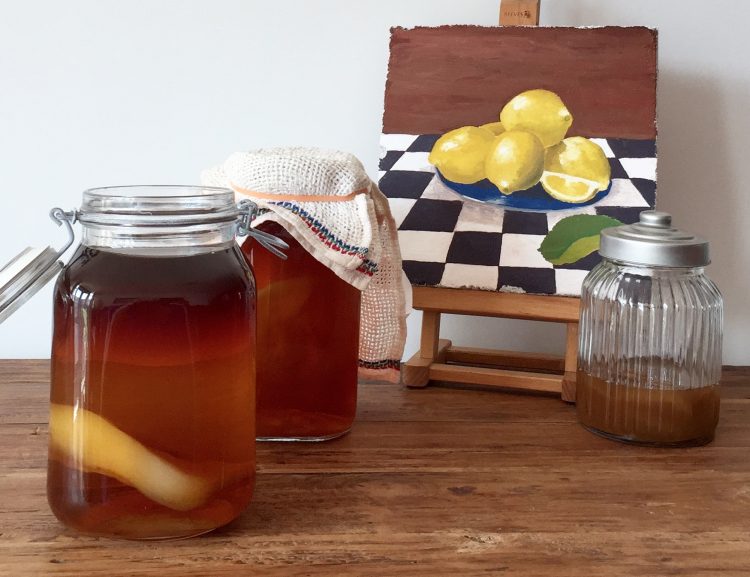
Have a look at my photo. From left to right…
2 litre jar with scoby
1.5 litre jar with scoby and light cloth
My fresco: Still Life with Lemons
Jar of extra scobys
When I make a batch of kombucha I do it first thing in the morning, or before I go to bed. The tea needs to cool before you add the scoby and secure the light cloth and allow the fermentation process to take place. Here’s the recipe I use with great success. For this, you’ll need a 2 litre sterilized jar.
4 teabags of black tea (or green tea, but I find black works better)
2 litres boiled water
100 grams of white sugar
1 scoby
I run my jar through the dishwasher to sterilize it. Into this jar, I pour two litres of freshly boiled water and add the sugar. After stirring to dissolve the sugar, I add four teabags of good quality black tea. I allow all of this to steep until the water comes to room temperature. When at room temp, I add the scoby and secure the opening with a lightly woven cloth. I then place the container in a quiet space where it won’t be disturbed for two weeks. Sometimes, this is my second bedroom; sometimes it’s on top of a tall bookshelf. After 10-14 days, I remove the scoby and pour the kombucha into sterilized jars which I then place in the fridge, ready for daily consumption!
As mentioned, I have another jar for extra scobys. If you make kombucha regularly, you’ll notice that the scoby can become quite thick (as seen in my photo.) What I will do with this scoby is separate it. Formed in layers, they pull apart quite easily. I store these extra layers in a separate For SCOBYs Only jar. These, I can use again, or give away.
As a final note, because the kombucha takes up to two weeks to ferment, I make a double batch so I constantly have a supply in my fridge! There are a lot of kombucha recipes out there. Some show adding fruit after the fermentation has taken place. Let your fingers do the walking and see if there are any variations you might want to try.